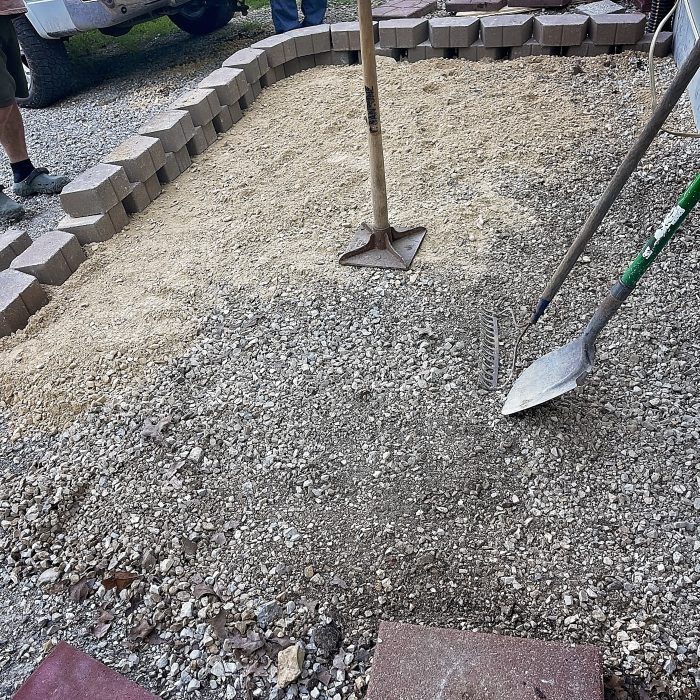
Next step on setting up the greenhouse is the foundation. We already had gravel here because the driveway leads off to the left of the photo, but it was not level yet. My husband did a little bit of leveling and then marked off the area with the retaining wall type stones. Some of the border is two stones tall and some is only one. We filled with gravel and he smoothed it out, leveled it, then flattened with whatever that flat thing with the handle is called… a stamp? (It’s currently a door stop to me, but that’s beside the point, haha.)
Once everything was level, we placed the red paving stones. We went with red as we already had a few outside the door in the absence of a porch at that door. But why paving stones?
Greenhouse Flooring
There’s several types of flooring you could go with, it really depends on what you are wanting to put in your greenhouse. I mainly have cacti and euphorbia, some tropical plants. I mostly want it arid and warm. My mom, in her bigger greenhouse, has vegetables, and others may want to extend their outdoor growing season with seedlings, etc. So check out these different ideas:
1. Bare Soil/Dirt Floor – This would be your most cost-effective option, of course, especially in a large greenhouse. Easiest to install, drains water naturally, retains more humidity if you need that. It is great for the type of greenhouse my mom has where she has raised beds off on each of the sides and so there’s no stopping to how far the roots can go because there’s just more dirt under there. The downsides would be that it is muddy when wet, dusty when dry. Difficult to clean and may be difficult to walk on; weeds will have a hayday with this type of flooring as well. You could have one of those holey rubbery walkways (what my mom utilizes) that can help with some of these downsides.
2. Gravel or Crushed Stone – I see this one around online a lot. Gravel has excellent drainage if you should spill some water, it’s rather inexpensive and very easy to put down. You can put a weed barrier underneath to help with weeds. Generally can have good tractions and footing when walking on it, since we are assuming the ground here will be level. However, you can still get some weeds through, the gravel can shift or compact unevenly, and it’s not real comfortable for standing for long periods of time, let alone any kneeling. This would be for practicality in greenhouses that see a lot of watering, good under large pots, and good for larger greenhouses for cost effectiveness.
3. Concrete – This would be a very durable and long-lasting option, easy to clean and sanitize. In a larger greenhouse, especially, stable surface for putting benches or rolling carts along. It also can help improve brightness/light and can help reflect heat as well. However, this would be a more expensive option and would likely need some drains to help with surface water, though concrete itself would eventually absorb the water and send it on through, if left unfinished. Concrete can also get pretty hot in the summer and cold in the winter. I see this more in a professional and large scale greenhouse, something probably open to the public to sell plants, where mobility and stability are key.
4. Pavers, Bricks, or Stone – Here we are at my pick. On the drainage scale, pavers fall somewhere between concrete and gravel, especially depending how you do the joints. You could use sand which would drain more. We used silicone, it does not absorb, though it will divert the water to where it will puddle and absorb. These can absorb heat in the day and release it slowly at night, helping with insulation purposes. They’re semi-permanent, if you need to pop one out and move it, you can. Cons – can be a bit labor intensive to lay, depending on the space you’re laying. It can get a little uneven over times as things settle. And you could get some weeds if you’re not really sealing it up, but really that’s not too bad in my experience (we’ve gotten a few outside the greenhouse where it’s not siliconed in between). But also – the look! I love how it looks in there! Definitely a good balance of beauty and function.
5. Rubber Mats or Interlocking Tiles – These can be comfortable to stand on with the give they have in them and their non-slip surfaces. Easy to clean and/or replace, and can even go over other types of flooring. Drainage is not solved here, it depends what’s underneath, and they can get moldy or slimy if they’re constantly wet. Can be less durable. These might be best for pathways or places you need some comfort and cleanliness, probably not great to do the whole greenhouse with this flooring. Not to mention, double the flooring means double the cost.
6. Wood Decking or Slatted Floors – this, to me, would mostly be an aesthetic choice. You get drainage between the planks and a warm natural look. You could raise this up over the gravel or soil so it’s got some space between. Bit more comfortable to walk on than concrete or bricks. Some downsides: more susceptible to rot or insect infestation, slippery when wet, more expensive and you need that regular maintenance.
So there you have it, a few options. There may be more ideas, but this is all I have for you right now!
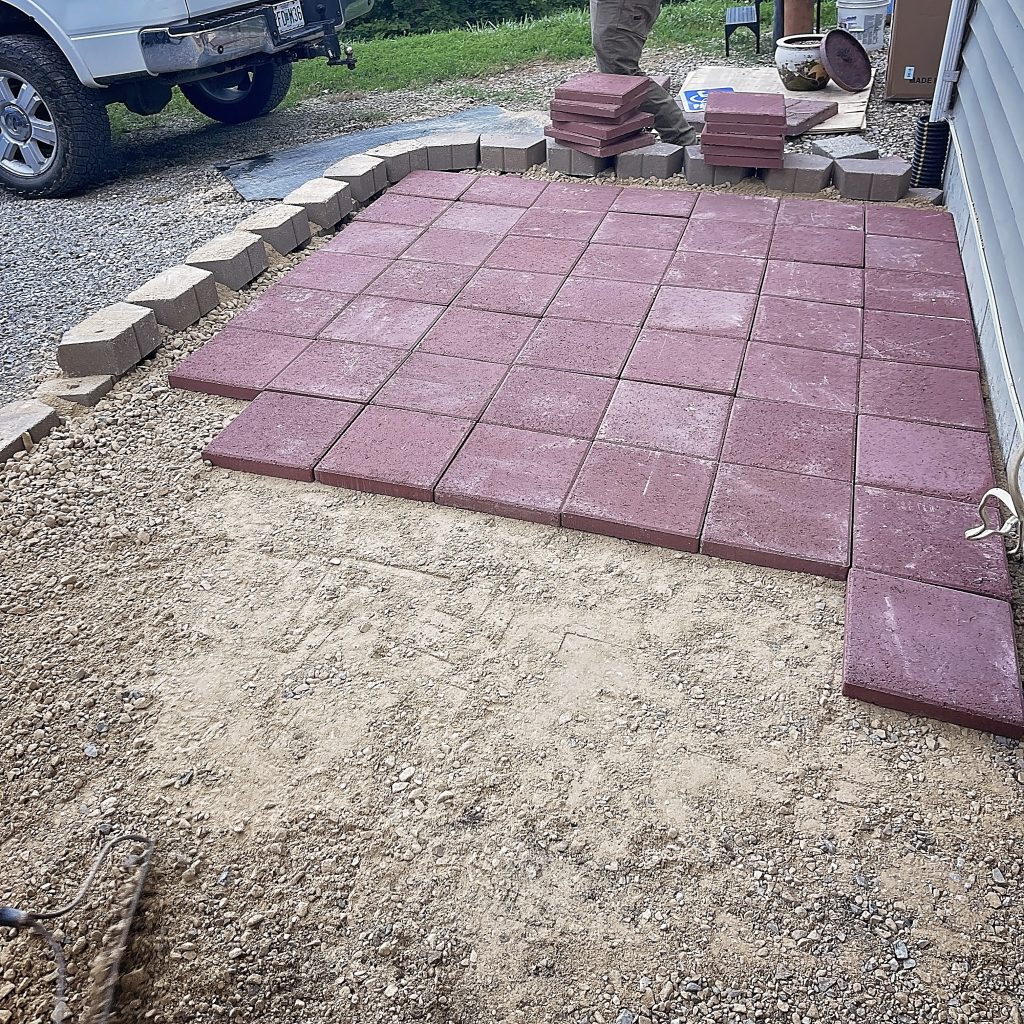
Some additional info: note that the pavers are not going all the way to the mini-wall, and there’s also that rounded corner. We left the foundational pavers square and left the gravel open in those spaces. I then filled it with some soil and currently have hardy succulents planted all down the left side. The back is still presently empty, just soil. I have not yet decided what to do there. The toads liked to winter there last year and near the curve is the exit pipe for my heat system (more on that later), it gets very hot so it may be a case that nothing can be planted there anyway in about a 1.5′ space on each side.